ASRock motherboards with Intel XMP 3.0 and AMD EXPO memory overclocking tutorial (with BIOS setup and validation)

This post will teach you how to turn on the memory Intel XMP 3.0 Profile (Extreme Memory Profile), AMD EXPO Profile (Extended Profiles for Overclocking) in ASRock motherboards. There will also be a video for your reference.
ASRock motherboard Intel XMP/AMD EXPO BIOS setup steps and memory frequency verification instruction.
First of all, when you see ASRock logo during the boot process, press Del or F12 to enter BIOS.
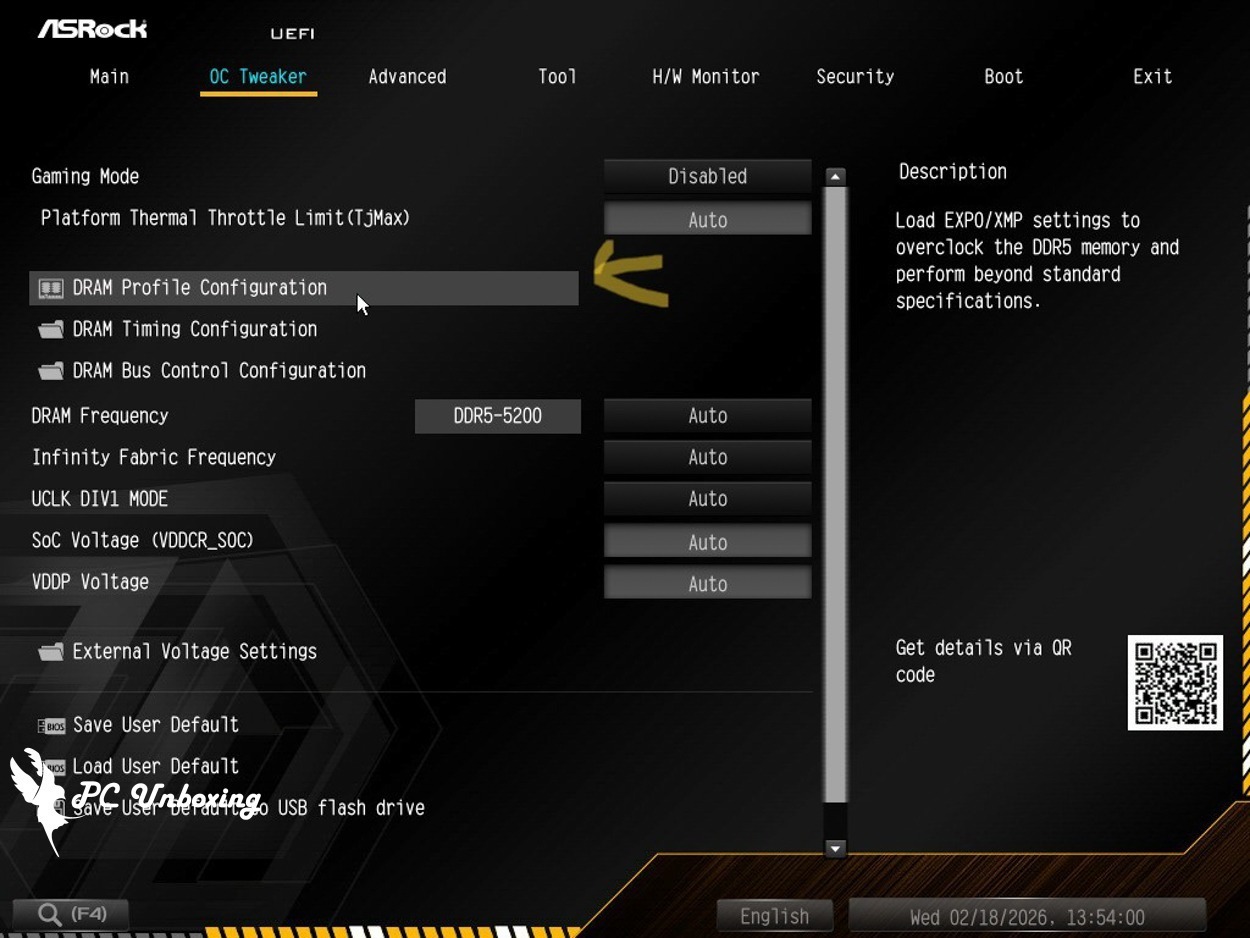
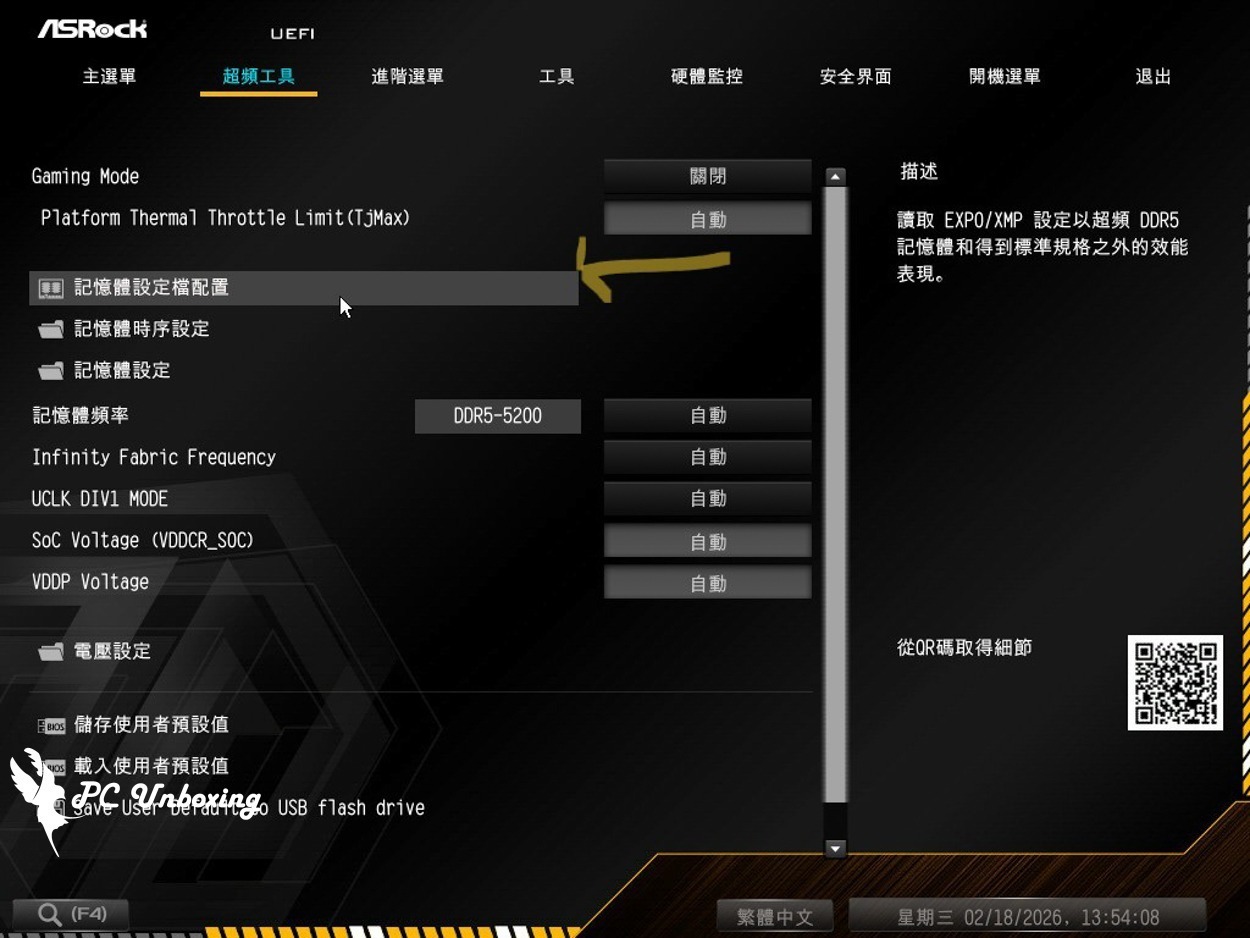
After entering the BIOS, click the "DRAM Profile Configuration" option on the "OC Tweaker Overclocking Tools" page.
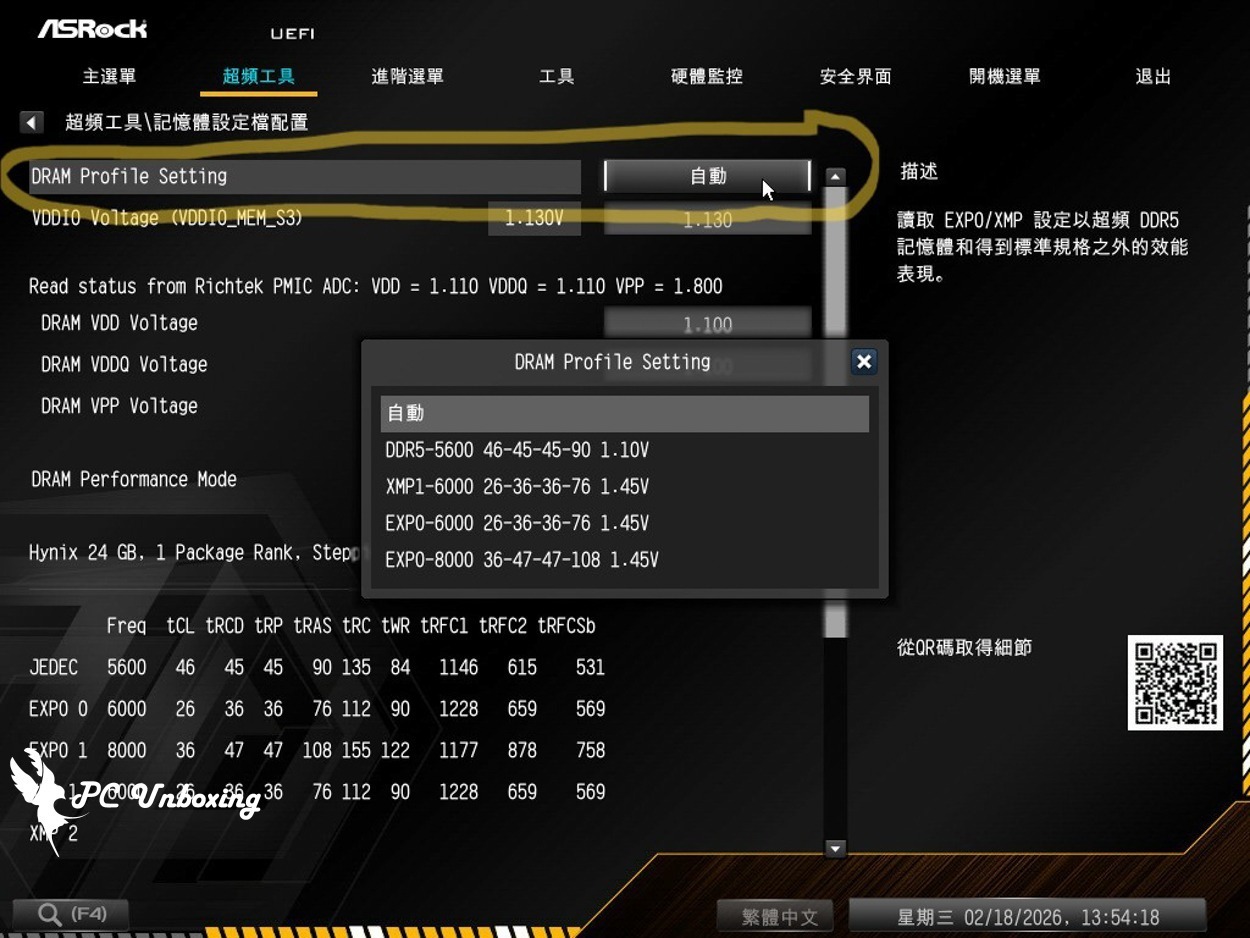
Next, select the Profile you want to use in the DRAM Profile Setting.
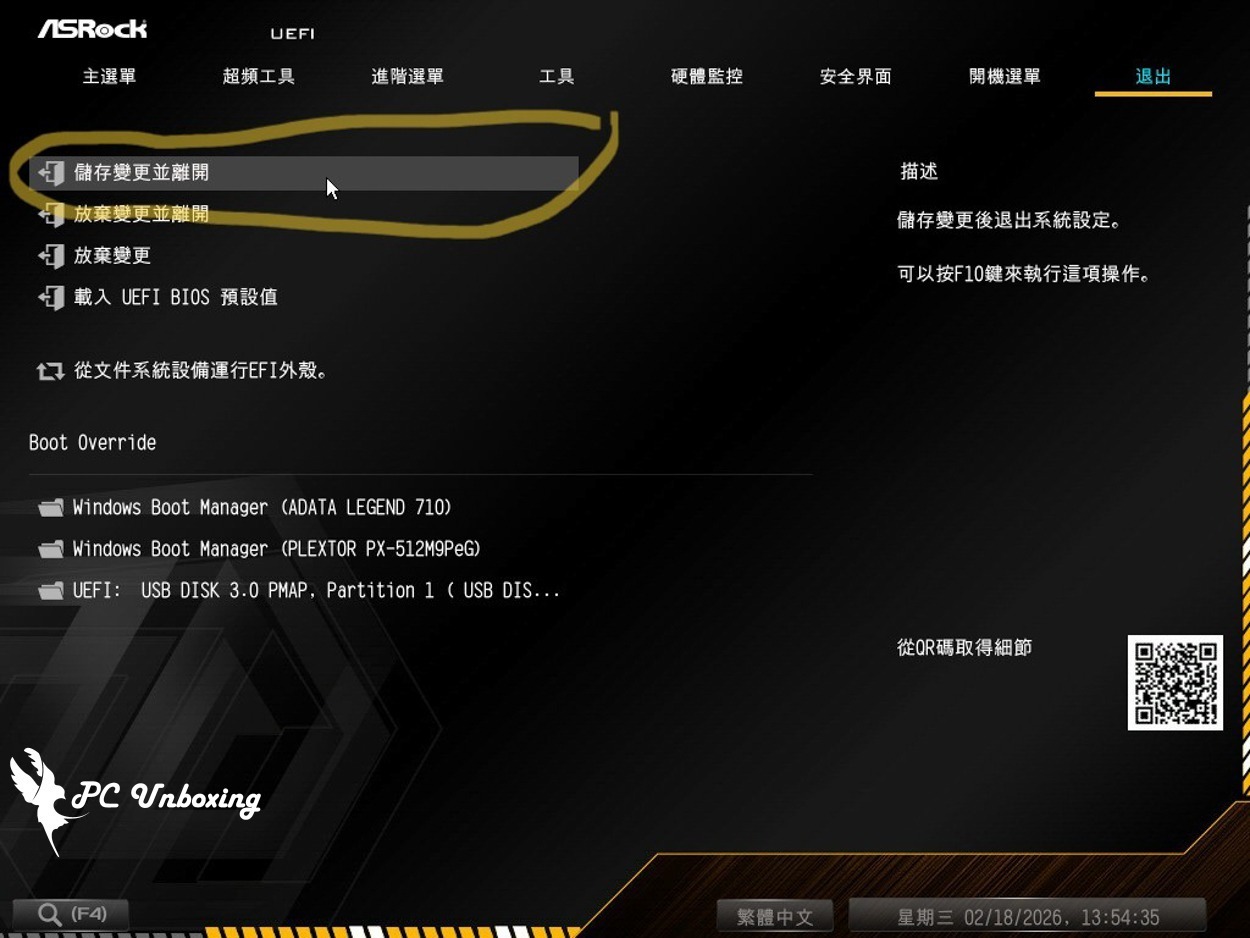
Then press F10 to save the settings and allow the motherboard to train.
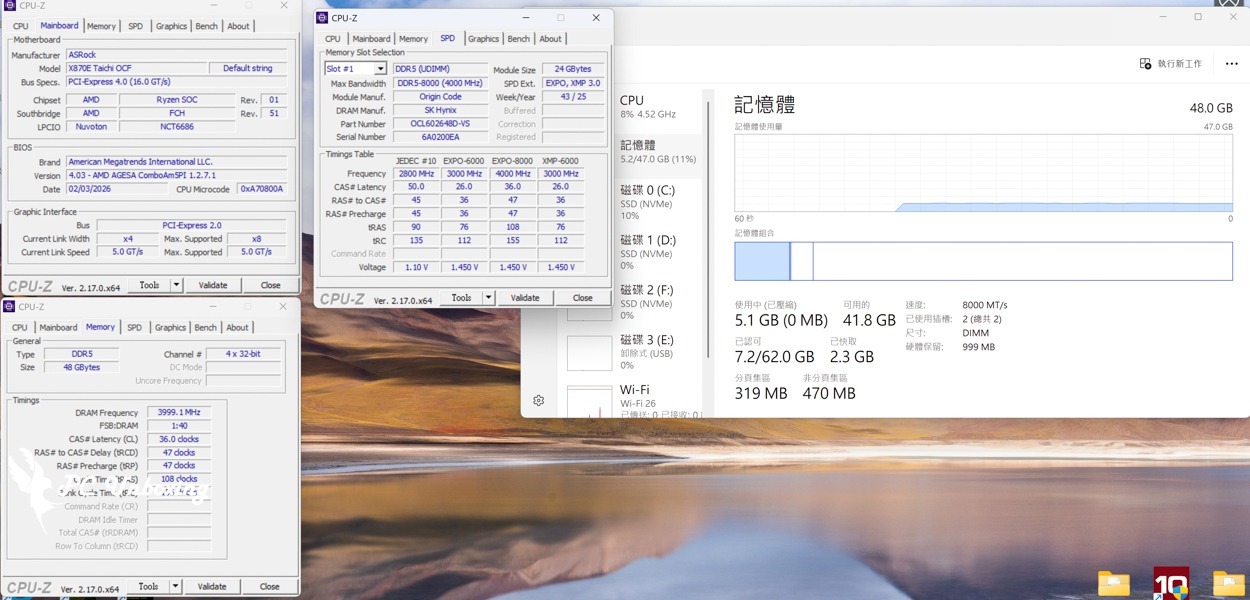
After entering the system, you can use the CPU-Z software to check if the system is operating according to the profile written in the memory SPD. For the memory that the author demonstrated, the AMD EXPO 2 Profile is written as 8000 MT/s CL36-47-47-108 1.45V, and you can see that the frequency of the operation meets the written specification in the CPU-Z software: 8000 MT/s(=2X 4000 MHz) CL36-47-47-108.
Or simply use the job manager to determine whether the operation speed is up to standard, but the information displayed by the job manager is incomplete, so it is only recommended to use it when you are lazy.
Yun
Drinks with less than full sugar are colored water. Crossing Turbid Creek, full sugar is not a crime!